

In four steps
- STEP 1: Create a transparent header “part”.
- STEP 2: Assign a unique (and identifiable) class to the header group.
- STEP 3: Open your CSS up. And use the class created above (set position to absolute, top to zero, and width to 100%).
- STEP 4: Use your new header
Step 1: Creating the transparent header.
If you haven’t already, let’s create a new template part, and call it “my new transparent header”.
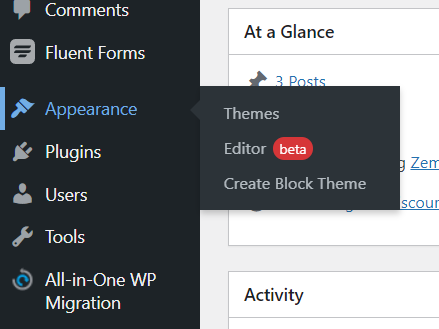
Navigate to Appearance > Editor. And on the Site Edit screen, navigate to Template parts to add new.
Now, you can go ahead and customize your design as needed. And make sure you remove background colors.
Step 2: Assign a CSS class to the parent container.
Now, we assign a class to the parent element, this will allow us to style the element and pass some styles to child elements (blocks you added to your header).
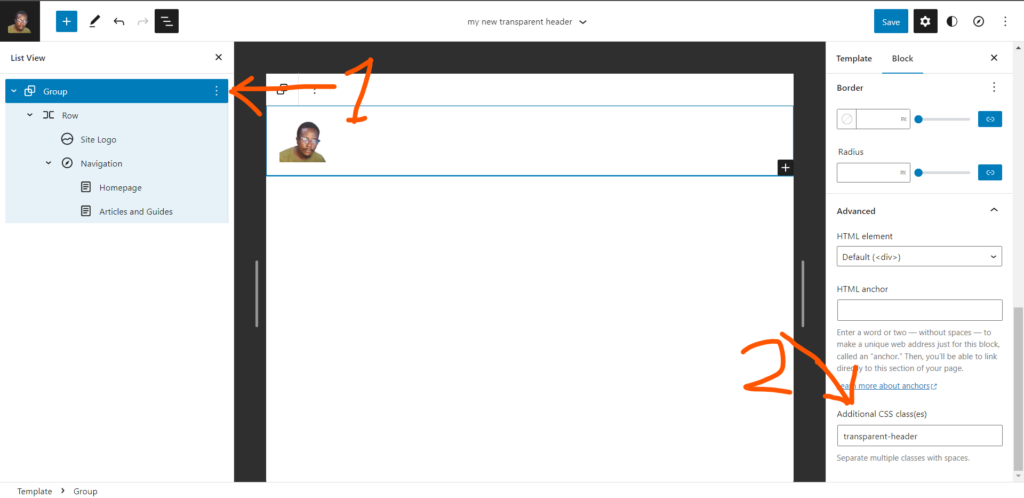
To easily access the parent element, click on the list view icon.

It will show the full list of blocks in this header. Choose the parent container (in my case the parent container is a group block)(1), and on the block edit pane on the right, scroll to “advanced” and add your custom class(2).
Step 3: Style the class
Now, let’s get into the nitty-gritty. There are a couple of popular methods used when creating transparent headers, the common ones usually involve using a negative margin (i.e margin-top: -100px;) to pull the first block/column on the page below the header you create. But due to responsiveness settings limitations that the Gutenberg editor currently has, this is not a practical solution. A working, effortlessly responsive alternative is adjusting the header’s position to “absolute”.
Let’s get started. This style below is all the magic we need.
.transparent-header {
  position: absolute;
  top: 0;
  width: 100%;
  justify-content: space-between;
}
A little surgery on the CSS styles.
- Position(Absolute); We are positioning this element we assigned the class to relative to the nearest parent element. The header template part blocks are sandwiched within the HTML element <header> with class “wp-block-template-part”, it stays within this when set to absolute.
- Top (0); Set to start at 0(zero) distance from the top.
- Width (100%);
- Justify-content (space-between); Since I only have two elements in my header, the logo and navigation blocks. Since I want them on either end of the section, “space-between” puts maximum available space between them. Depending on your header design, this is optional.
In some cases, the elements you have in the header might not show on the front end. And sometimes they do display but are not clickable. To sort this, we will use “z-index” to put the elements contained in the header above every other.
.transparent-header *, .transparent-header > * {
z-index: 10;
}
The final CSS code will look like this…
.transparent-header {
  position: absolute;
  top: 0;
  width: 100%;
  justify-content: space-between;
}
.transparent-header *, .transparent-header > * {
z-index: 10;
}
Where can I add CSS?
- You can add CSS to your child theme’s style.css file. To do that, FTP into your site directory, find the style.css file, and paste the CSS style there.
- You can also add custom CSS to your site using a plugin like Simple Custom CSS Plugin or Simple Custom CSS and JS.
- You can still use the old WordPress customizer page. Just append your domain with “/wp-admin/customize.php” (i.e domain.com/wp-admin/customize.php). Click “Additional CSS”, then paste the code there.
Step 4: Use your new transparent header.
To make use of the new header you need to create a page template that you will use on pages that require a transparent header.
To do that, you have to edit your child theme to create the new page template as “page-transparent-header.html” in the templates folder. Once done, it will show up in the page editor.
You can also create a new page template on the “Edit Site” page like we did the header part, but as of the time I am writing this, the feature is not yet part of WordPress core. However, there is a smooth walkaround.
Create or edit a page, in the section where you select the page template. There is an icon to create a new template, click on that to create a template with the newly created header.
That’s it, your transparent header is ready!.
From here, you can go ahead and create a page, set the page template to the new one you created and that is it. For the best result, make sure the first element on the page is a “Cover” Block. There are ready-made patterns you can import.
If you found this helpful, please let me know in the comment section.
Iree oooo!